It’s pretty unusual for a maintenance department to track just one type of equipment. And even on the rare occasions when they do, they still have to track different makes, models, etc. (think about a fleet of vehicles, for instance).
This is why ManagerPlus allows you to set up different “Maintenance Log Types” for different types of assets. For instance, you can set up miles as a maintenance log type for your vehicles, and create a log to track hours for your forklifts. That way, when you create a work order for a fleet vehicle maintenance, only the maintenance log for miles will appear (rather than both hours and miles, which could lead to data entry errors and confusion).
Before I walk through the steps of setting up a log type, let’s define a few of ManagerPlus’s maintenance management software‘s log related terms you’ll need to understand first.
Metered Log:
this is a log taken from an odometer or other type of meter. Each log value you enter replaces the previous entry (each entry is tracked separately, so you can always go back and see each submission, nothing is erased or over-written). Meters can be set as “Descending” meaning they begin with a higher value and drop lower with each log entry (this way the system knows whether to expect a lower or higher value for each subsequent log entry).
Allow Meter Reset:
Turning on this option will ‘save your place’ in the event that a meter is reset or replaced. For example, if you’ve been recording miles for a given vehicle and have to replace the odometer, this option will save your place and add subsequent log values to the last reading from the odometer before it was replaced.
Calculated Log:
this type is dependent on another log – it will automatically, with no additional entry, take each log entry and calculate an average, max, min, or sum for a period. Calculating the “average temperature over 30 days” or “total weekly hours” would be examples of these types of logs.
Uses Log Warnings:
you will want to turn this option on if you are concerned about data entry errors. If, say, a log value of 2,250 is entered when the previous log entry was 20,000, the system will create a pop up alert and highlight the entry so that you can further review it and make any corrections that may be necessary.
Ok, with some of the definitions under our belt, let’s walk through the Maintenance Log Type creation process (click on each image below to expand).
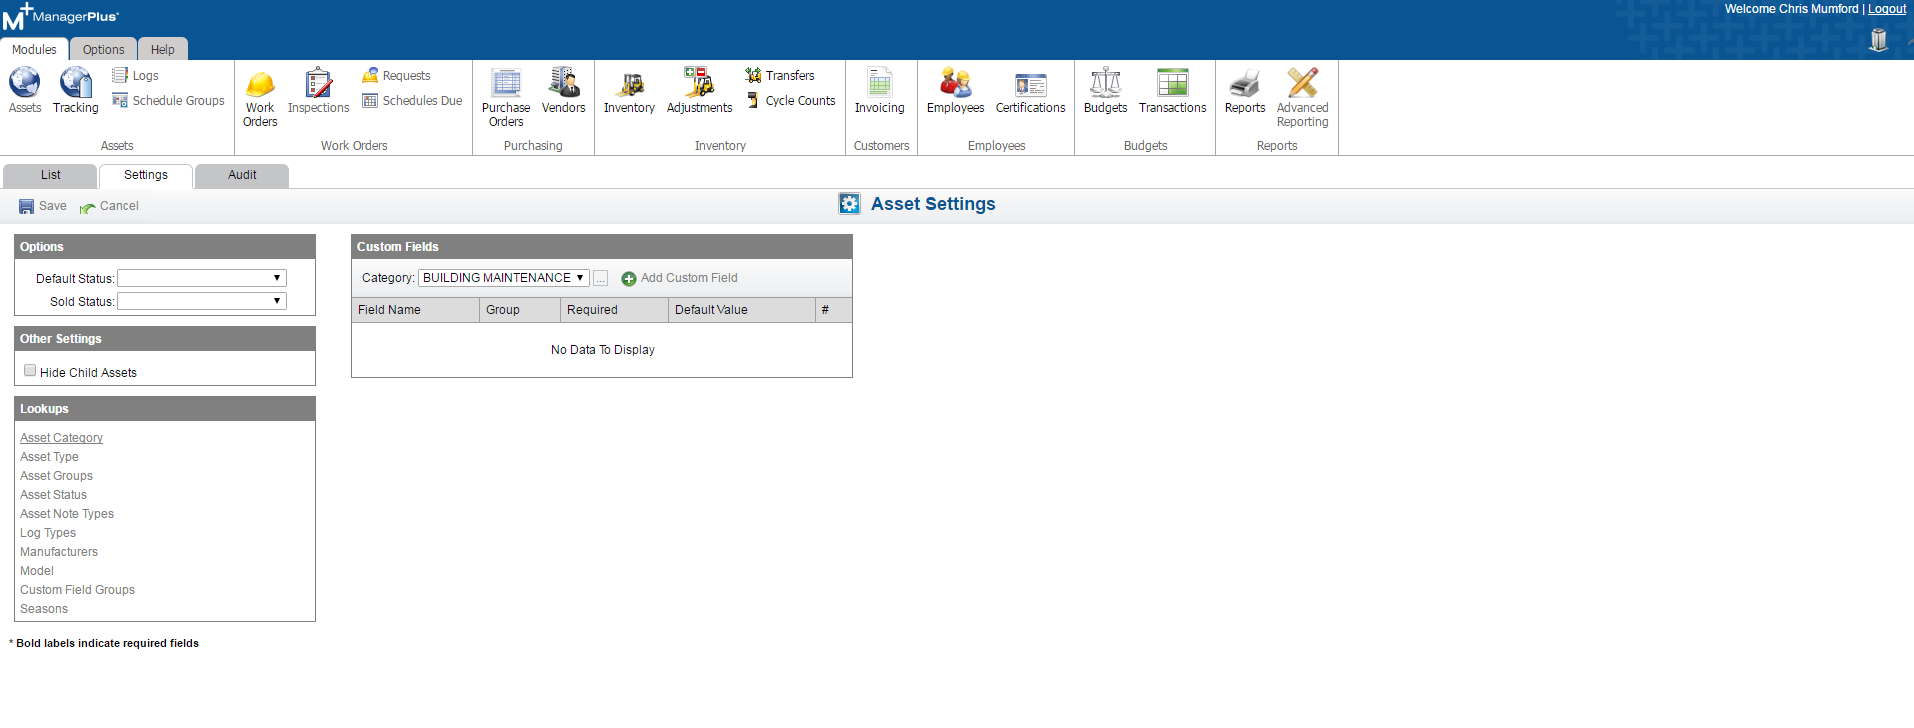
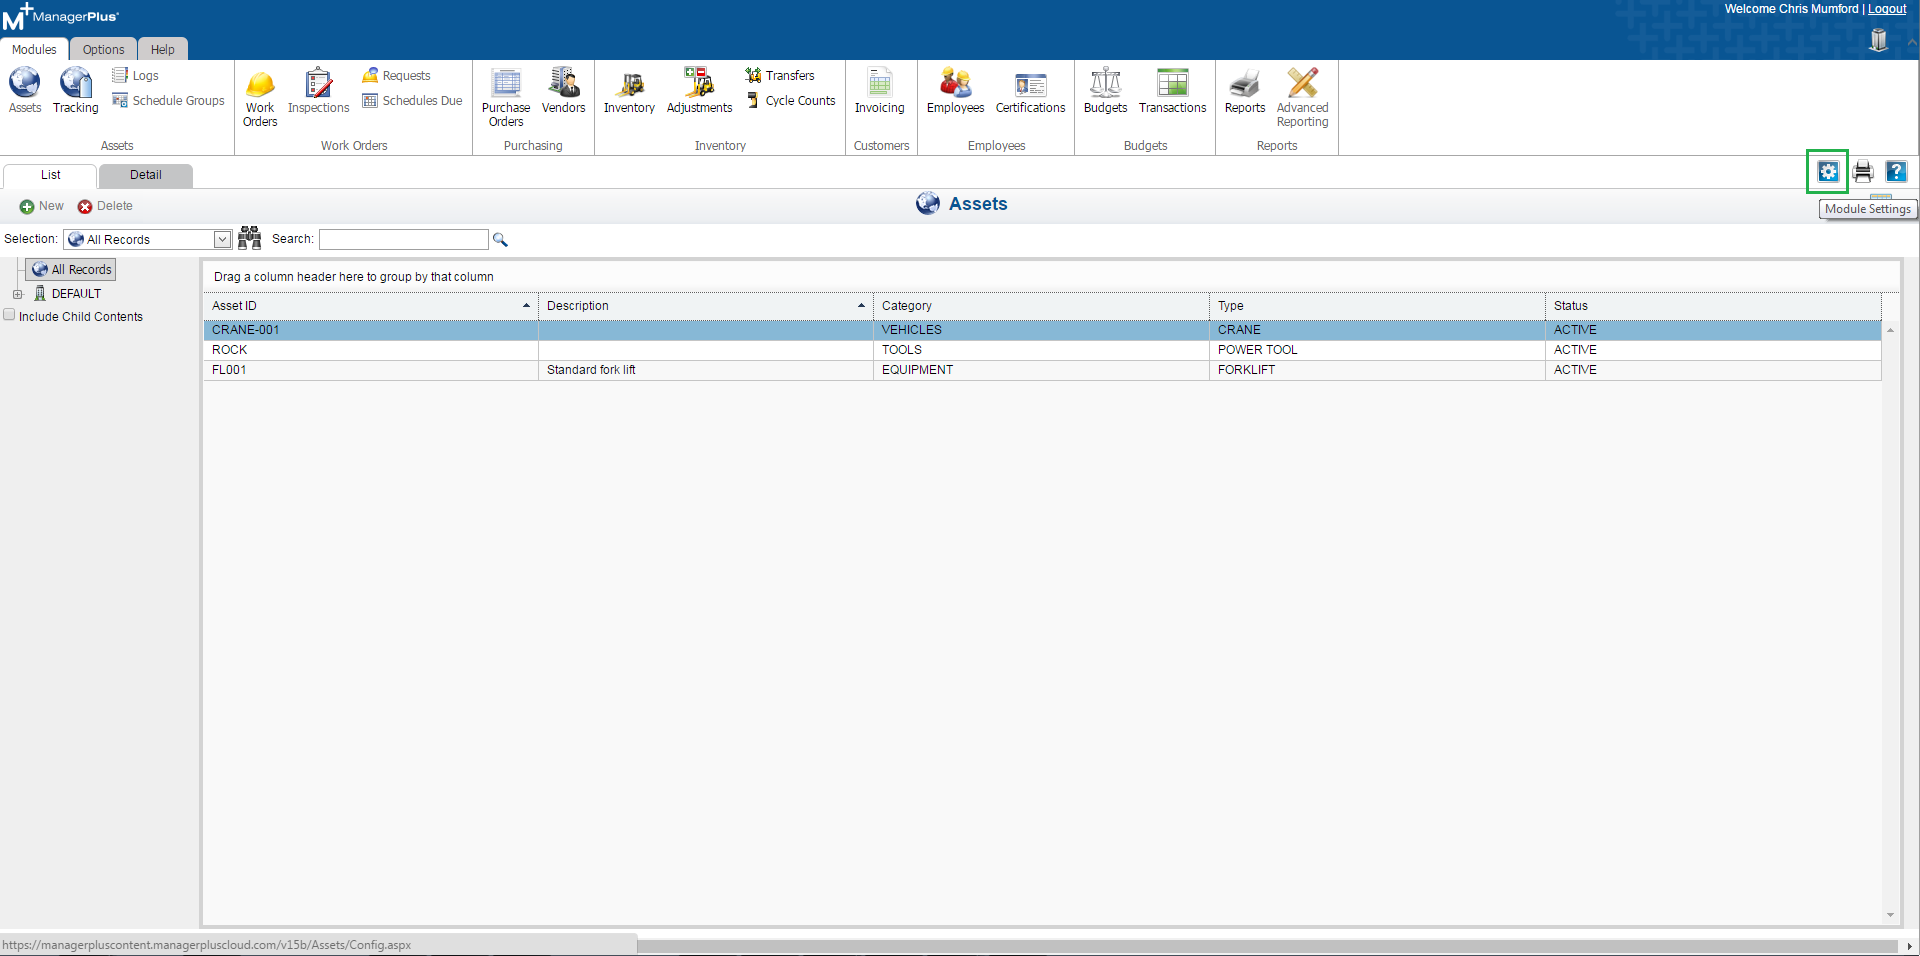
1. Click on the “Assets” module and click on the gear icon.
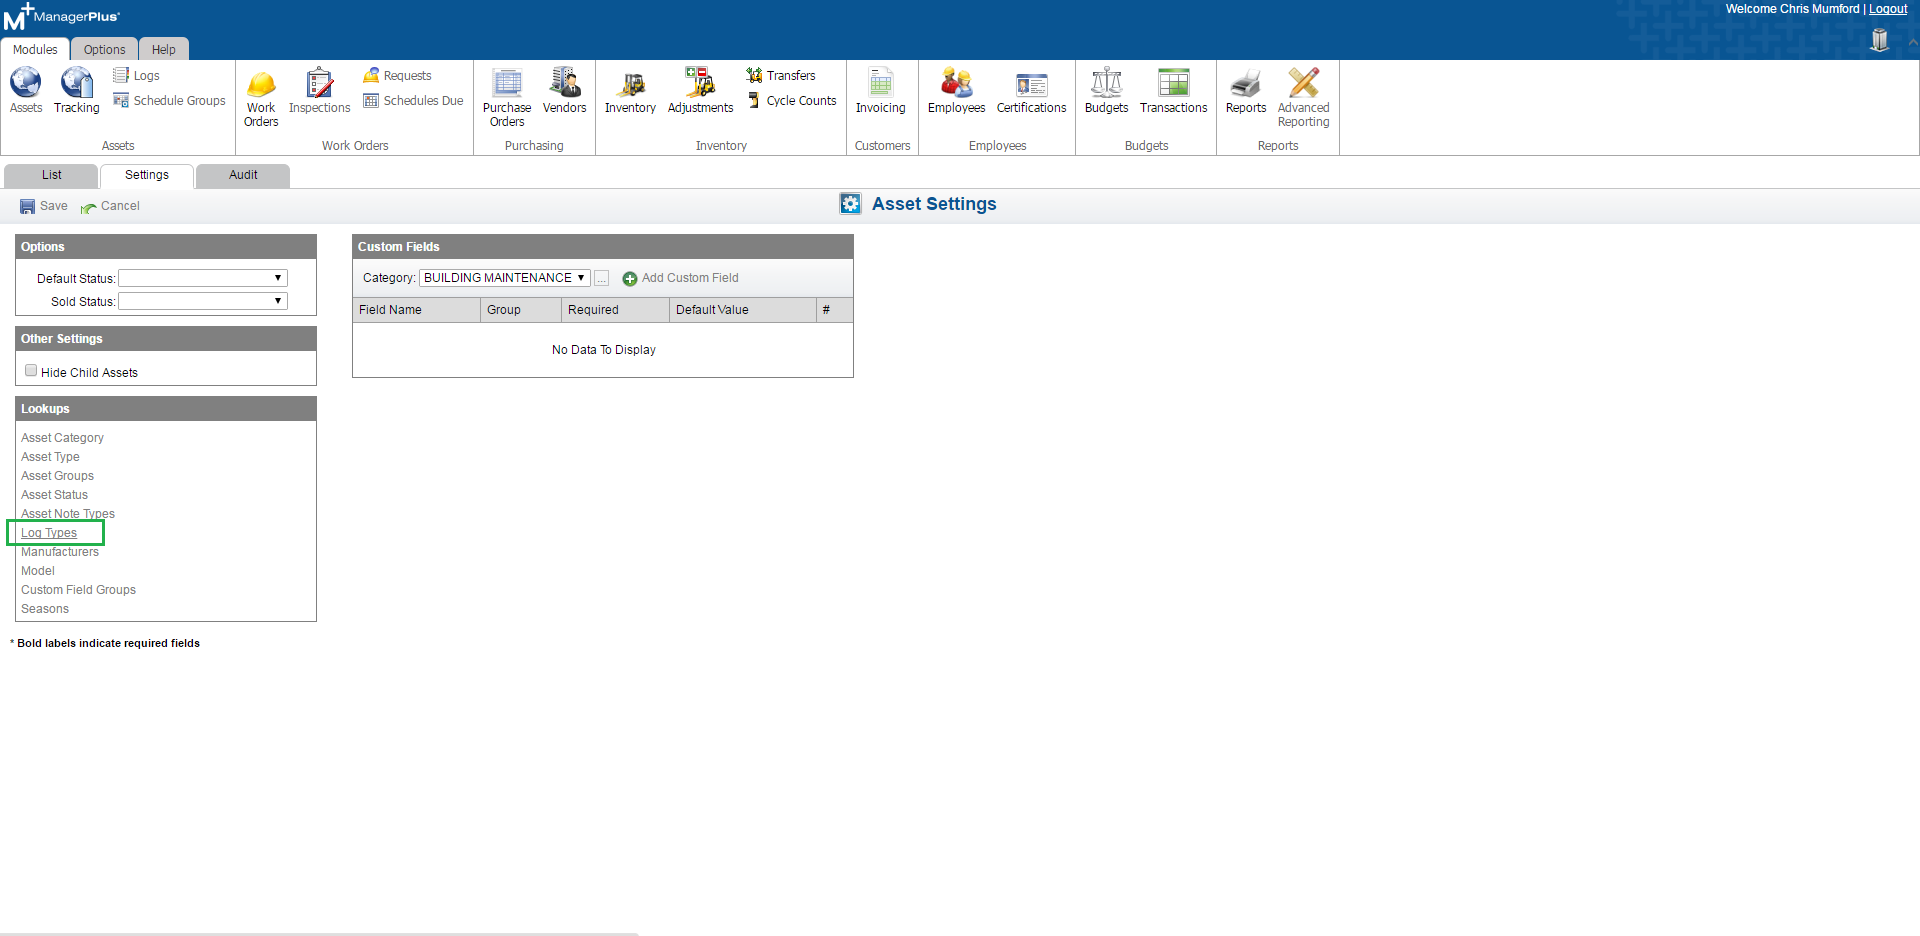
2. Within the Asset Settings area, click on “Log Types.”
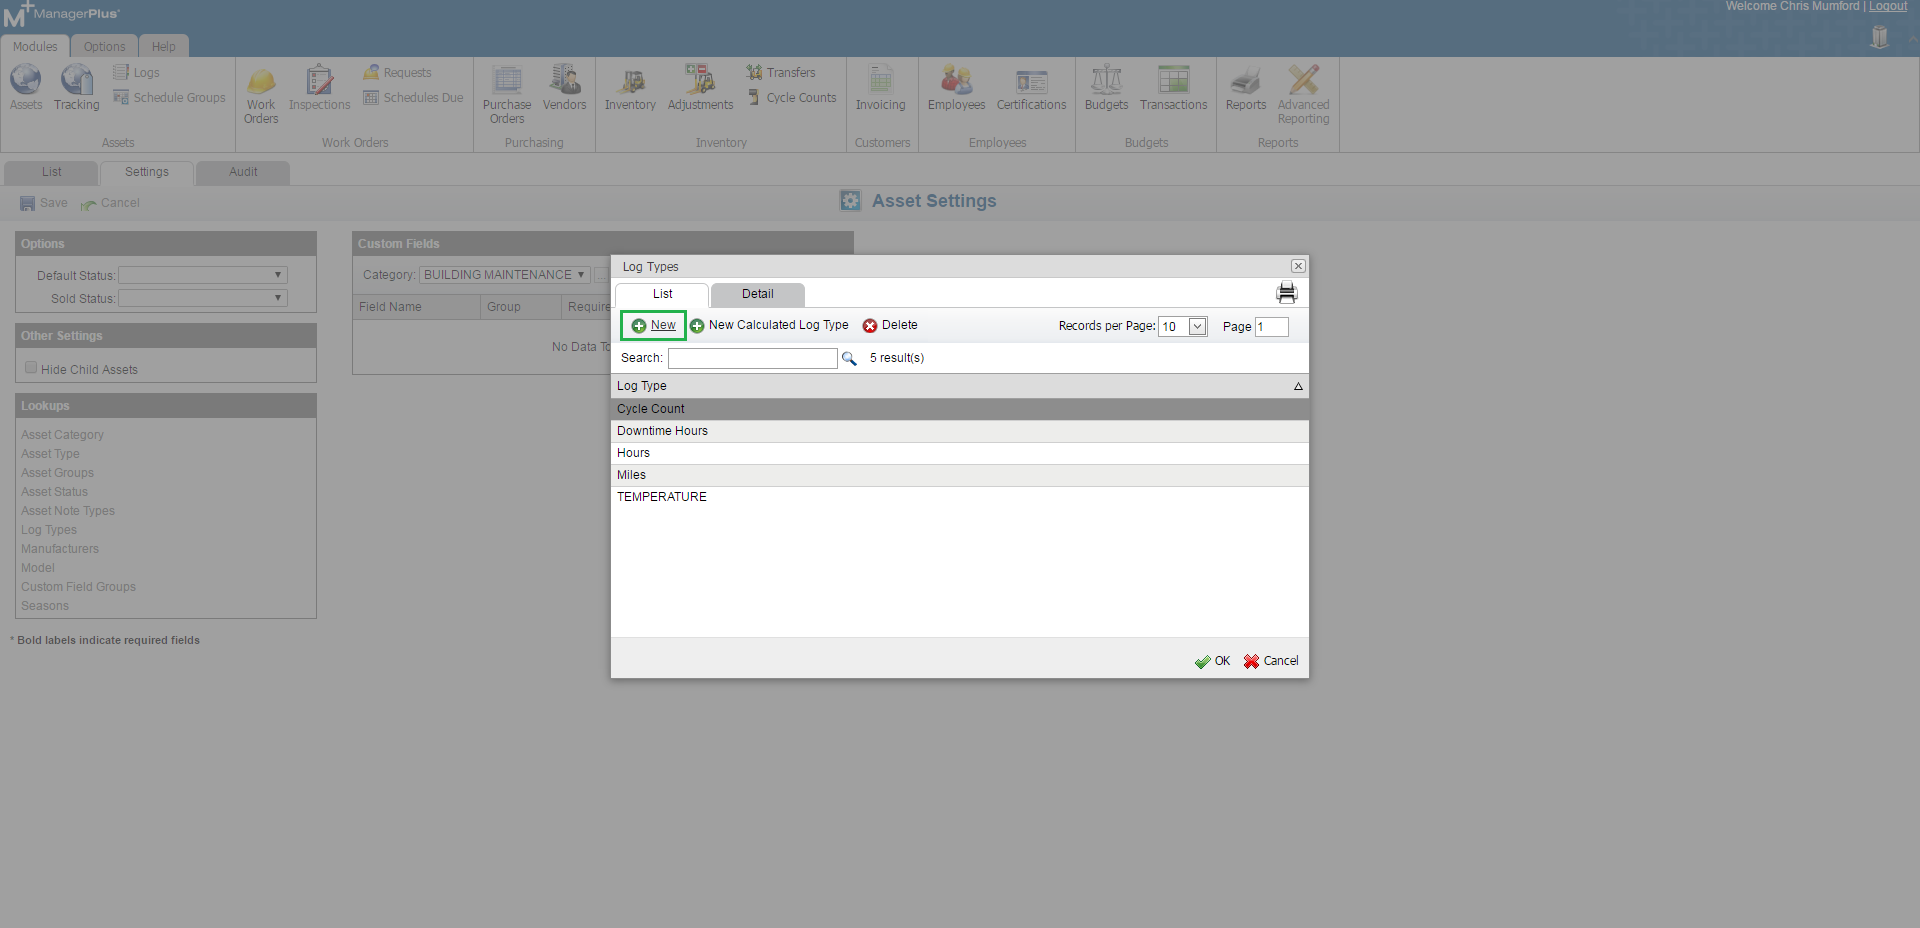
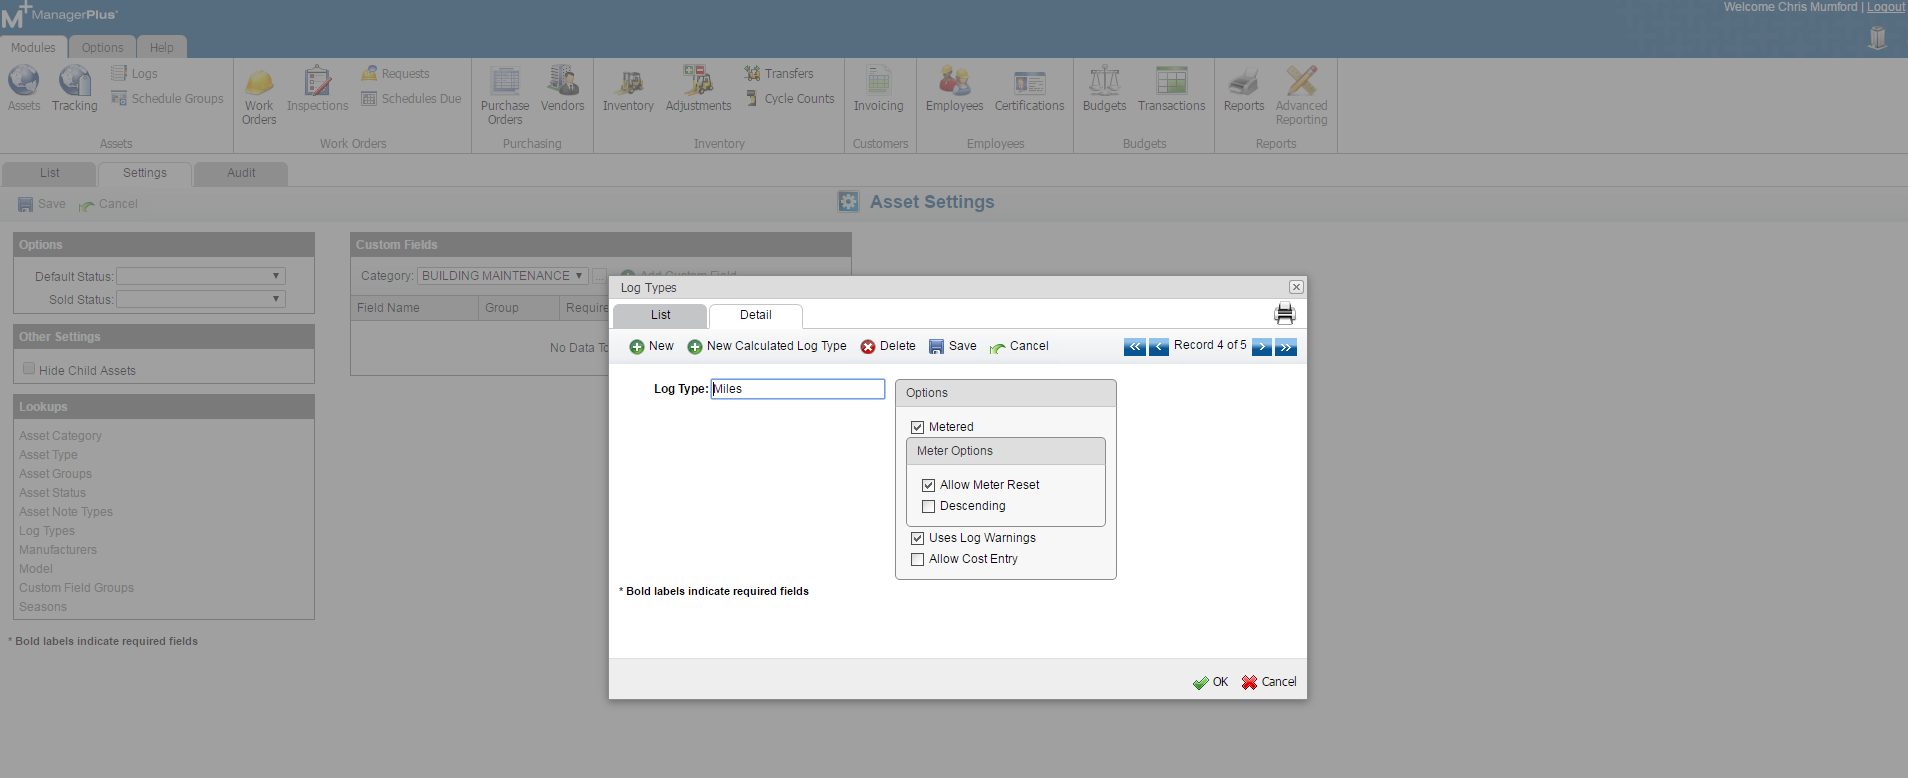
 3. Click “New” in the Log Type window that pops up.
4. Set up your new log. In the example below we have created a log type for “Miles.” This is set as a metered log, meaning that it is an aggregate reading, like you’d see on an odometer or a temperature gauge. Each maintenance log replaces the previous reading. Selecting the “Allow Meter Reset” option will enable you to track a meter even if it is replaced or reset, without losing your place. A calculated log would be something that adds up over time, such as hours (i.e., each log reading is added together to get the total). The “Uses Log Warnings” option will monitor the log entries and alert you if the value entered is outside the normal range (this helps reduce keying errors and can be customized).
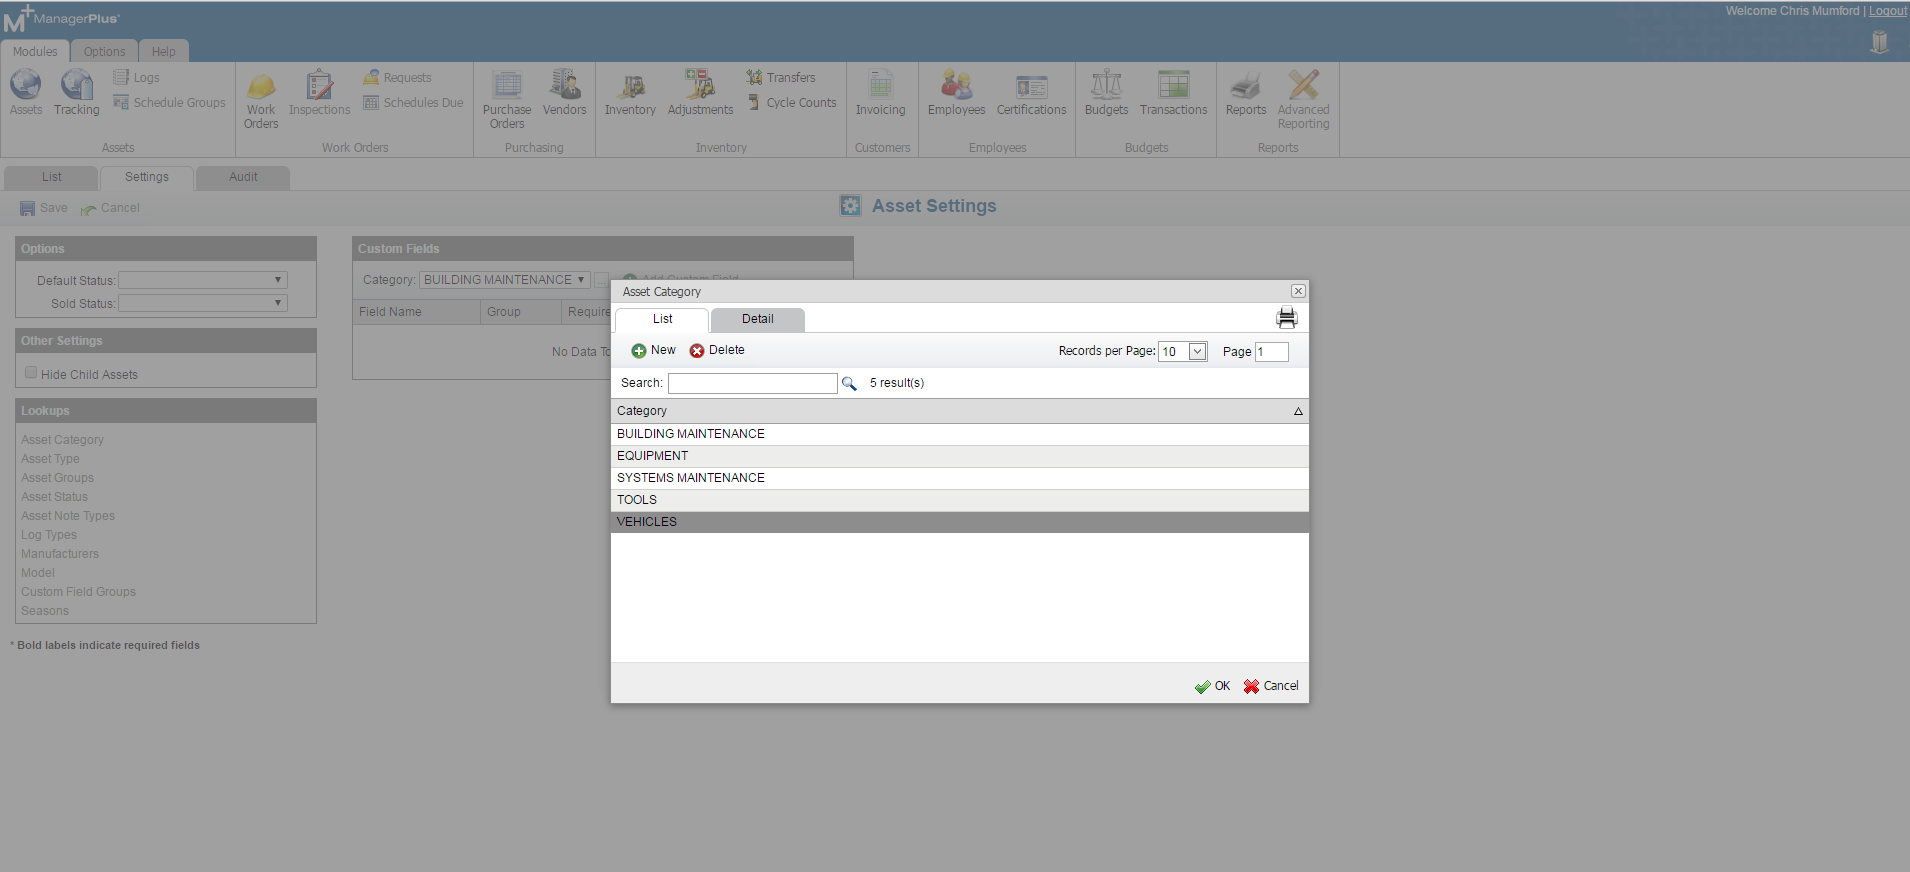
 5. Once you’ve finished configuring your Log Type, click “Ok” and return to the “Asset Settings” area. You will now want to associate this new Log Type with your assets. To do this, click on “Asset Category.”
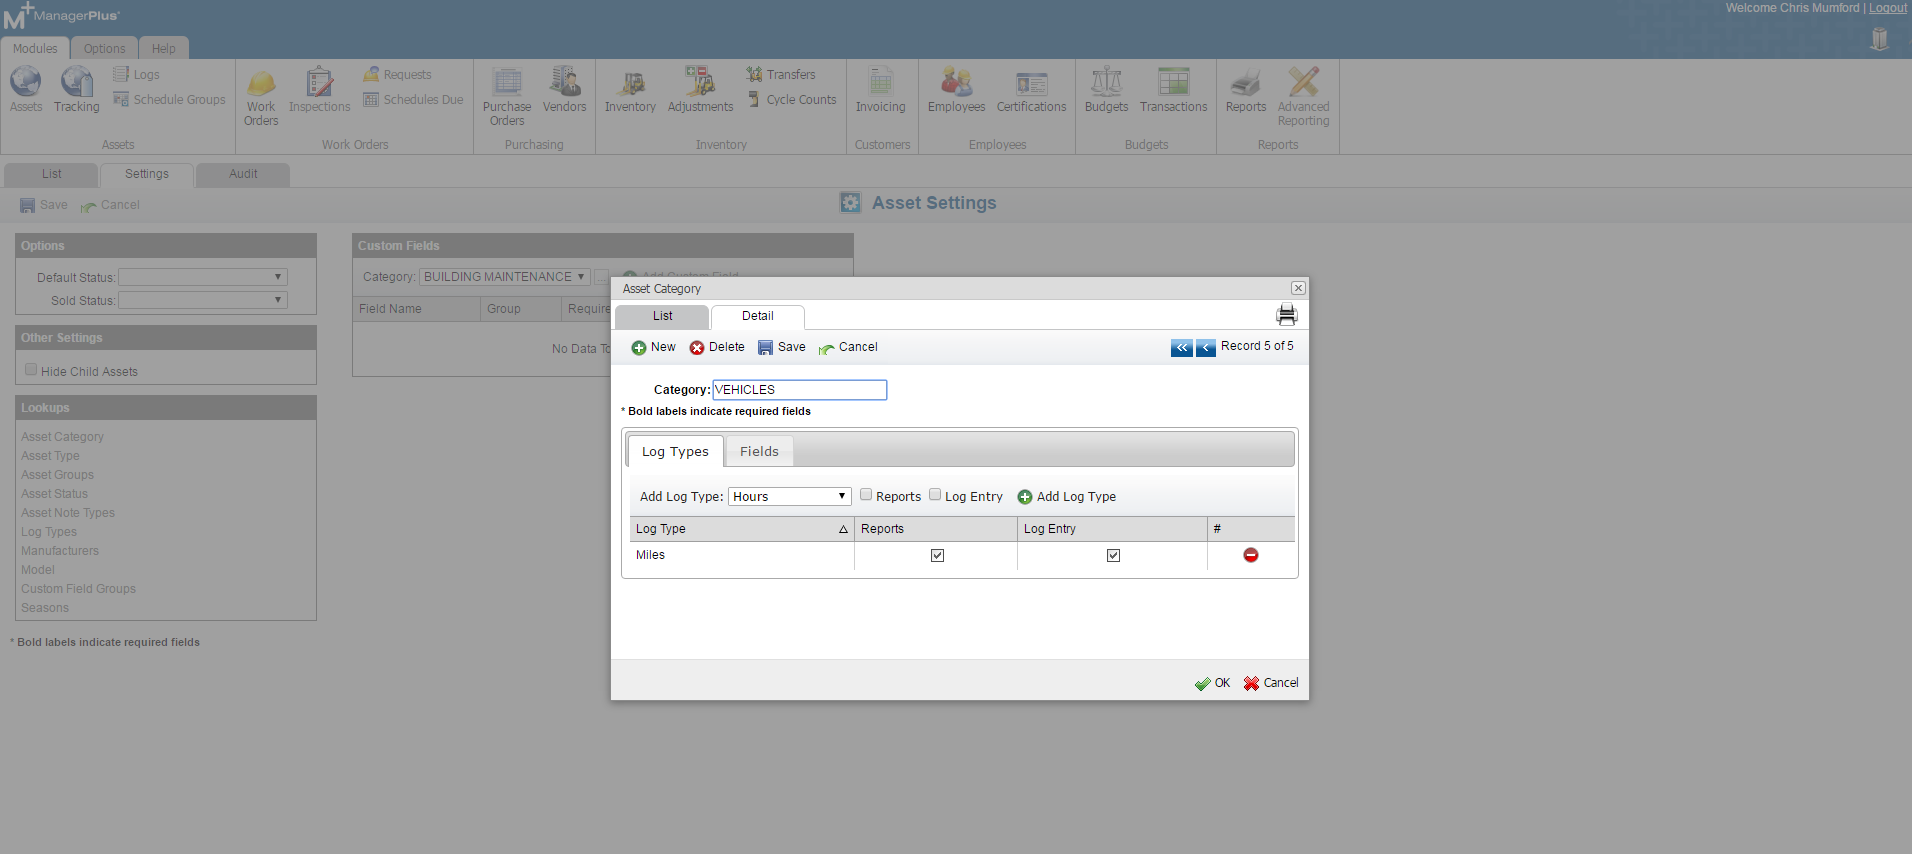
6. In the “Asset Category” window, choose the asset category that you’d like to record this log for by double clicking it (or by selecting it and clicking on the “Detail” tab). In our example, we will associate our Log Type “Miles” with the “Vehicles” asset category.
7. On the “Detail” tab, select the Log Type you just created from the “Add Log Type” drop-down menu, then click “Add Log Type.” Then check the boxes under “Reports” and “Log Entry.” Click “Ok” when you’re done.
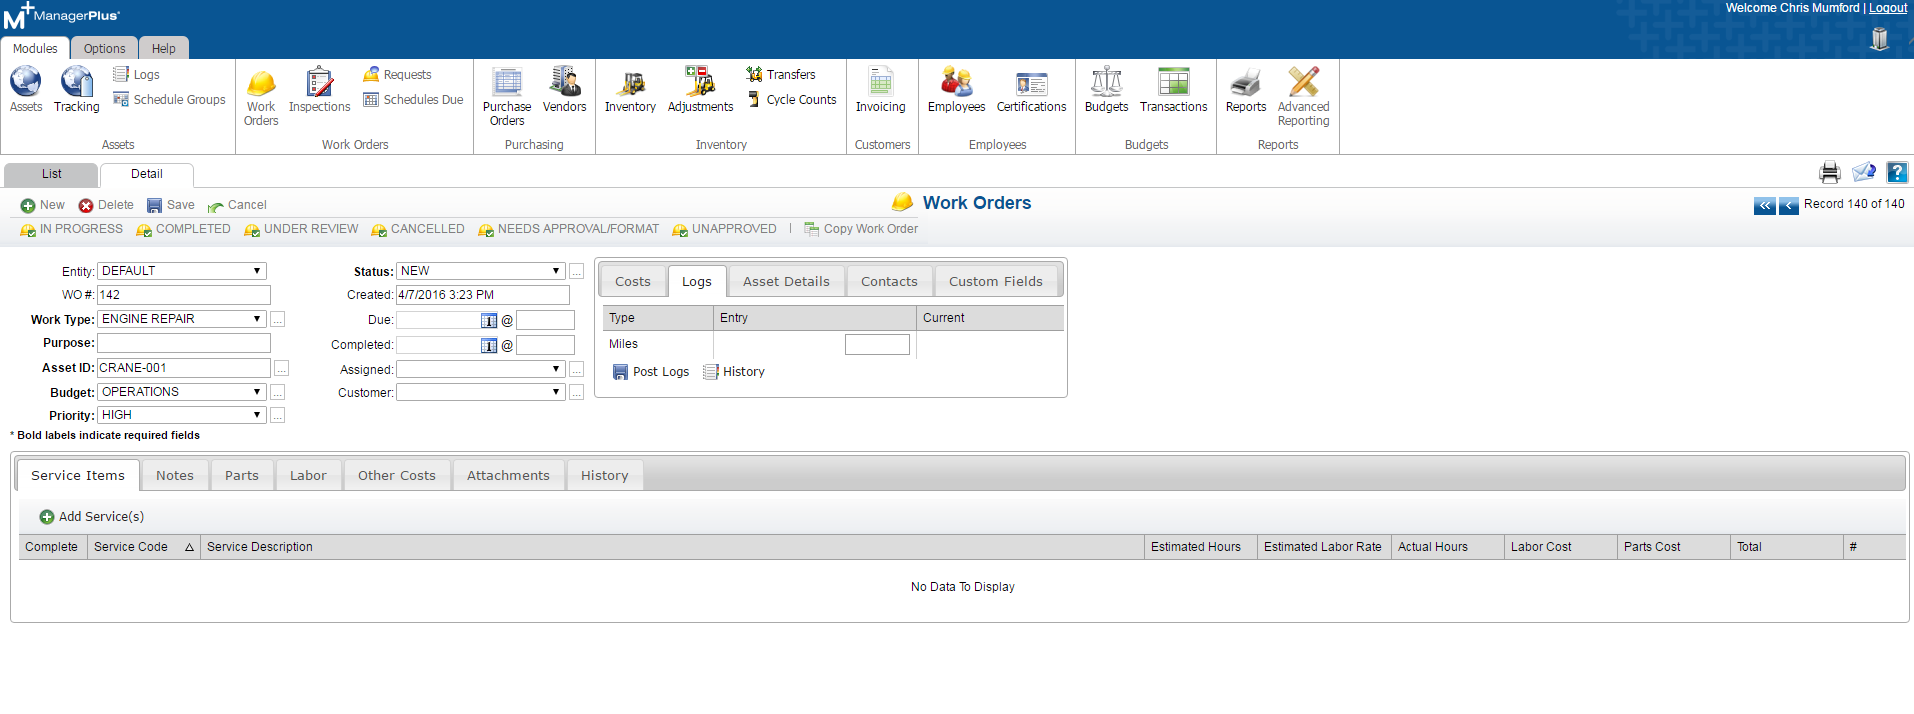
8. Now, when you create a work order associated with an asset from the category you selected in step 6, you will be able to enter log values for the Log Type you just entered.
 Give it a try! Experiment with the options and let us know if you have any questions. Be sure to check back here regularly for all of the latest news, tips, and insights from ManagerPlus.
[blog_cta id=’87f123ee-ba69-4976-b1c6-61ef65196f7c’]

